
Add new types of charts
In PowerPoint 2016 (as well as Excel 2016 and Word 2016), you get six new types of charts you can add to documents: Treemap, Sunburst, Waterfall, Histogram, Pareto, and Box & Whisker. Each provides a unique way to display data visually. See our Excel 2016 cheat sheet for details about the new chart types, including what each one looks like and what type of data it’s best suited for.
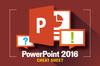
To insert any of the new chart types (or any other chart) in a document, select Insert > Chart and then choose the type of chart to insert. You can also click the chart icon in the area that appears when you create a new slide — it’s in the box that also lets you add text, tables, graphics and other content. Whichever way you choose to add the chart, it appears in your document with placeholder data, and a pop-up window appears that looks like a mini Excel spreadsheet. Enter or edit the data, or else click the Edit in Excel button to open it up in Excel and edit it there.
 IDG
IDG
When you insert a chart, a window where you can edit the data pops up.
Note that the Pareto chart does not show up when you select Insert > Chart. To insert one, you’ll have to first select Histogram from the list of chart types, and at the top of the screen that appears, select the option to the right, Pareto.
The following three features are available only for people who subscribe to Office 365. If you have the standalone version of PowerPoint 2016, you can skip right to the keyboard shortcuts chart.
Get a jump-start on your presentations
After PowerPoint 2016 was introduced, Microsoft rolled out QuickStarter, a great tool for anyone who hates being confronted with a blank slate when starting a presentation. Available only for Office 365 subscribers, it jump-starts your presentation by helping you with research and outline creation.
To use it, when you create a new presentation, select QuickStarter, type in the topic of your presentation, and then choose from a list of subtopics. QuickStarter suggests a set of slides you might want to use, based on Bing searches and information from Wikipedia. Choose which slide(s) to keep, and then select a look for your slides, including a theme complete with background graphics. You’ve now got a good start on your presentation.
Boost your presentations with Designer, Morph and Zoom
Three other features introduced after the release of PowerPoint 2016, and thus available only to Office 365 subscribers, are Designer, Morph and Zoom.
Designer makes it easy to quickly create high-quality slides without you doing much work. When you insert an image into a slide, the Design Ideas panel opens on the right side of the screen, offering you a choice of multiple layouts for the slide. Choose the layout you want and take it from there.
Microsoft claims the feature was built with the help of graphic designers and takes into account the content of the image. For example, a Microsoft blog about Designer and Morph claims that “if the visual contains a natural scene, Designer can zoom, crop and frame it. But if the image contains a chart, it focuses in on the relevant region to ensure the important data is highlighted.”
As for Morph, it lets you show motion in transitions and inside slides, but without having to use the Animations tab. To use it, duplicate an existing slide: Select the slide, then, on the Home tab, click the down arrow next to New Slide and select Duplicate Selected Slides. Then make changes to that duplicate, such as shrinking an element or elements in it, making them bigger, moving them to new locations and/or rotating them. Now select Morph from the Transitions tab, and PowerPoint automatically creates an animated transition between the slides. Onscreen, they look like a single slide morphing.
The third new feature, Zoom, makes it easy to jump around in your presentation, showing your slides in nonsequential order. It does this by creating a kind of visual shortcuts table that lets you quickly zoom from one section to another — handy in case you want to go back to a previous slide or skip over a section of your presentation.
When you’re in a presentation, select Insert > Zoom. You get a choice of three different kinds of Zoom:
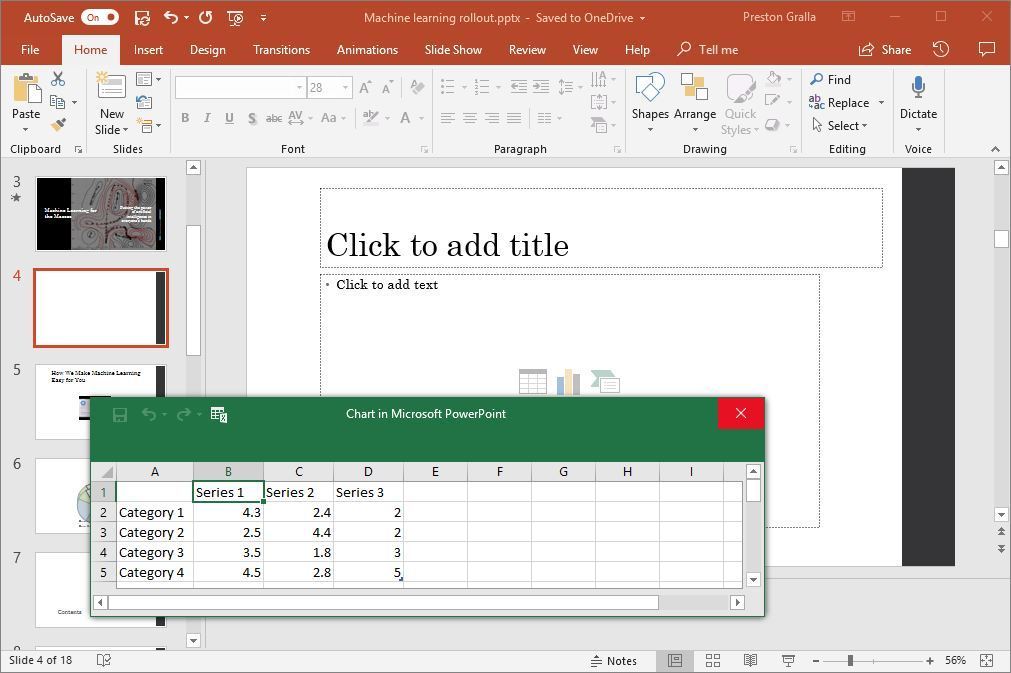
- Summary Zoom: This lets you create a visual summary of your presentation. You select the slides you want included in the summary. Each of those slides becomes the beginning of a section of the presentation. When you’re giving a presentation, you can click a thumbnail on the Summary Zoom slide to go to the beginning slide of a section.
- Section Zoom: If you’ve already created sections in your presentation, when you choose Section Zoom you’ll see those sections. Choose which you want to put on your Section Zoom slide. Then when you’re giving a presentation, click any thumbnail to jump to that section.
- Slide Zoom: This lets you jump from a slide to any other slide in the presentation. It’s generally best used for short presentations without many sections. After you click Slide Zoom, you select which slides you want to be able to jump to, and they’ll show up in a Slide Zoom slide. Click any slide to jump to it.
 IDG
IDG
Here’s how to insert a Summary Zoom slide, with thumbnails of your entire presentation.
Use AutoSave as a safety net while you work
Worried about losing your work on a presentation because you forgot to constantly save it? Worry no more. AutoSave, available only for those with Office 365 subscriptions, automatically saves your files for you, so you won’t have to worry about system crashes, power outages, Office crashes and similar problems. Be aware, though, that it works only on documents that are stored in OneDrive, OneDrive for Business or SharePoint Online.
You may think you’re already protected against these problems because of the AutoRecover feature built into Office 2016. But AutoSave is significantly different and better than AutoRecover. AutoRecover doesn’t save your file in real time, so it’s easy for you to lose work. Instead, every several minutes it saves an AutoRecover file that you can try to recover after a crash. But this feature doesn’t always work (for example, if you don’t properly open Office after the crash, or if the crash doesn’t meet Microsoft’s definition of a crash). And Microsoft notes, “AutoRecover is only effective for unplanned disruptions, such as a power outage or a crash. AutoRecover files are not designed to be saved when a logoff is scheduled or an orderly shutdown occurs.” And the files aren’t saved in real time, so you’ll lose several minutes of work even if all goes as planned.
AutoSave is turned on by default in the subscription version of PowerPoint 2016 (for documents stored in OneDrive, OneDrive for Business or SharePoint Online). To turn it off (or back on again), use the AutoSave button on the top left of the screen.
AutoSave has another great feature as well: You can use Version History to go back to previous versions of a file, review them, and copy and paste from an older file to your existing one. You can also restore an entire old version.
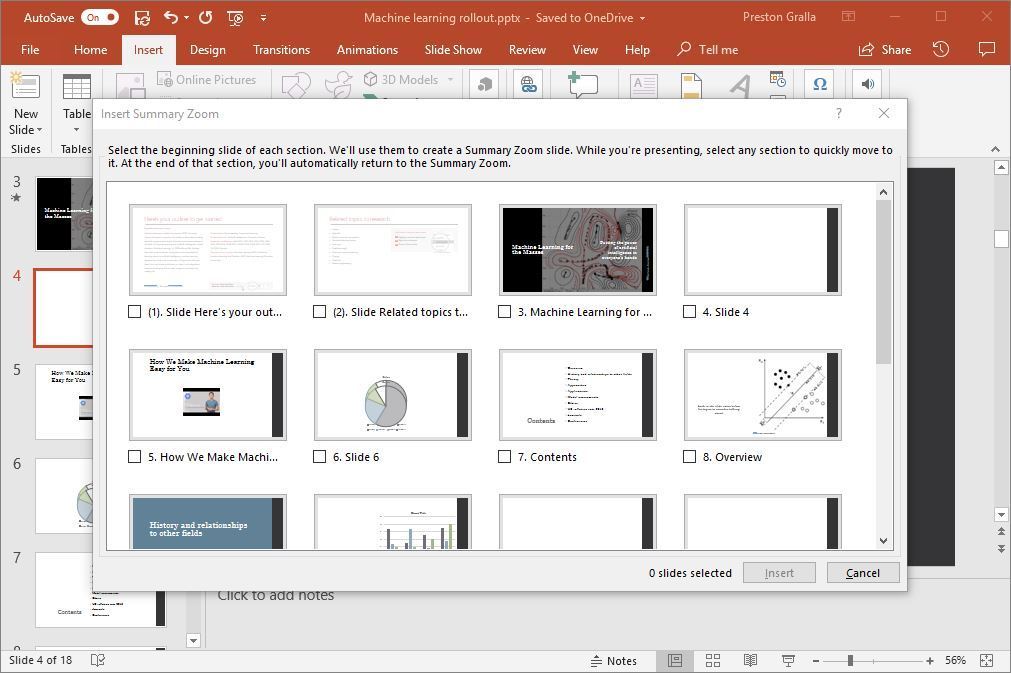
To use it, with a file open, click the file name at the top of the screen. A dropdown menu appears with the location of the file and a Version History section. Click “See all versions,” and the Version History pane appears on the right side of the screen with a list of the previous versions of the file, including the time and date they were saved. Alternatively, you can click the Version History button on the upper-right corner of the screen (it looks like a clock surrounded by a circular arrow) to display the Version History pane.
Click “Open version” under any older version, and that version appears in a new window. Scroll through the version and copy any content you want.
 IDG
IDG
Scrolling through previous versions of a presentation.
Handy keyboard shortcuts
Using keyboard shortcuts is one of the best ways to accomplish tasks quickly in any version of PowerPoint 2016. You can even use them to navigate the Ribbon. For instance, Alt-H takes you to the Home tab, and Alt-G takes you to the Design tab. (For help finding specific commands on the Ribbon, see our PowerPoint 2016 Ribbon quick reference.)
But there are many other keyboard shortcuts to help you accomplish a vast array of tasks in PowerPoint 2016. We've listed the ones we've found the most useful below. Want even more shortcuts? Microsoft's Office site has comprehensive lists of shortcuts for creating and delivering PowerPoint presentations.
Useful PowerPoint 2016 keyboard shortcuts
Don't forget to download our PowerPoint 2016 Ribbon quick reference!